
This article will walk you through how to set up your OneTrust integration connection.
Once you’ve set up your OneTrust integration, refer to OneTrust Integration Data Mapping to learn how to map your data from OneTrust into your Ironclad workflow.
To learn more about the OneTrust integration, refer to the OneTrust Integration Overview.
Configure OneTrust
Required OneTrust Permissions: OneTrust Admin
In this section, we will walk you through how to configure your OneTrust instance to establish a proper connection with Ironclad.
- In OneTrust, navigate to Settings > Access Management > Client Credentials.
- Click Add.
- Enter the name of the client (e.g., "Ironclad"), and add a description (optional).
- In the Scope section, add the following scopes:
- Integration > INTEGRATIONS
- Inventory > All
- Third-Party Risk Management > All
- Click Create.
-
Make note of the Client ID and Client Secret to input in the next steps.
NOTE
We highly recommended downloading the Client ID and Client Secret for future reference.
Configure Ironclad
Required Ironclad Permissions: Ironclad Admin
Now, that you have your OneTrust Client ID and Client Secret, you can configure your Ironclad instance. 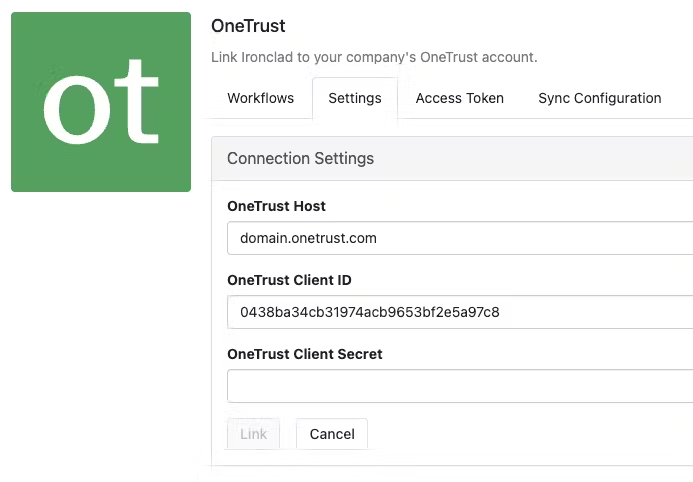
To configure your Ironclad instance:
- In Ironclad, click your profile icon in the top-right corner.
- Navigate to Company Settings > Integrations > OneTrust > Settings.
- Enter the OneTrust host, OneTrust Client ID, and OneTrust Client Secret.
- Click Link.
Set Up Automatic Approval Sync for Vendors
Required Ironclad Permissions: Ironclad Admin and OneTrust Admin
Automatic approval sync enables Ironclad to automatically pull in the vendor status from OneTrust into Ironclad.
Sync Configuration in Ironclad
- In Ironclad, navigate to Company Settings > Integrations > OneTrust > Access Token.
-
Click Create to create a new token, and then select Upload to OneTrust.
NOTE
We highly recommend saving this token in a secure location for future use. - Click Confirm and Close.
- Navigate to the Sync Configuration tab.
- Follow the prompts to:
- Create the custom attribute.
- Upload the sync configuration.
Create the Connection in OneTrust
- In OneTrust, click the launcher icon to open the app drawer > General Apps > Integrations.
- On the left-hand toolbar, click Connections.
- Enter Sync to Ironclad in the search bar and select this connection.
- Click the Edit icon located next to Ironclad in the conditional step.
- Click the Edit icon located next to Account Credentials.
- Click the Select Existing Credentials radio button and Ironclad Token option, then click Next > Finish > Save > Activate > OK.
Set Up Automatic Approval Sync for Engagements
Required Ironclad Permissions: Ironclad Admin & OneTrust Admin
Automatic engagement approval sync enables Ironclad to automatically pull in the engagement status from OneTrust into Ironclad.
\
NOTE
To complete the steps below, you must first set up automatic approval sync for vendors.
Create the Custom Attribute in OneTrust
- In OneTrust, click the launcher icon to open the app drawer.
- Navigate to Third-Party Risk Management > Attribute Manager > Engagement Attributes > View > Add Attribute.
- Ensure that the Name field has the exact value of "Ironclad Source ID" and the response type is Text.
- Add a description and click Save.
Upload the Sync Configuration in Ironclad
-
In Ironclad, navigate to Company Settings > Integrations > OneTrust > Sync Configuration.
NOTE
If you already had this page open, refresh the page to pull in the custom attribute. - Follow the prompt to upload the sync configuration.
Set Up Sync Configuration in OneTrust
- In OneTrust, click the launcher icon to open the app drawer > General Apps > Integrations.
- On the left-hand toolbar, click Connections.
- Enter Engagement Sync to Ironclad in the search bar and select this connection.
- Click the Edit icon located next to Ironclad in the conditional step.
- Click the Edit icon located next to Account Credentials.
- Click the Select Existing Credentials radio button and Ironclad Token option, then click Next > Finish > Save > Activate > OK.